如何設定Aruba交換機自動堆疊(Auto VSF)功能
戴致禮 Travis Tai
- 精誠資訊/恆逸教育訓練中心-資深講師
- 技術分類:網路管理與通訊應用
Aruba公司最新推出的Aruba CX交換機具有一種極受企業用戶喜愛,稱之為VSF(Virtual Stacking Framework)的虛擬化堆疊技術,該技術最多可允許堆疊10台交換機形成一台虛擬交換機,具有易於管理與簡化網路架構的優點。
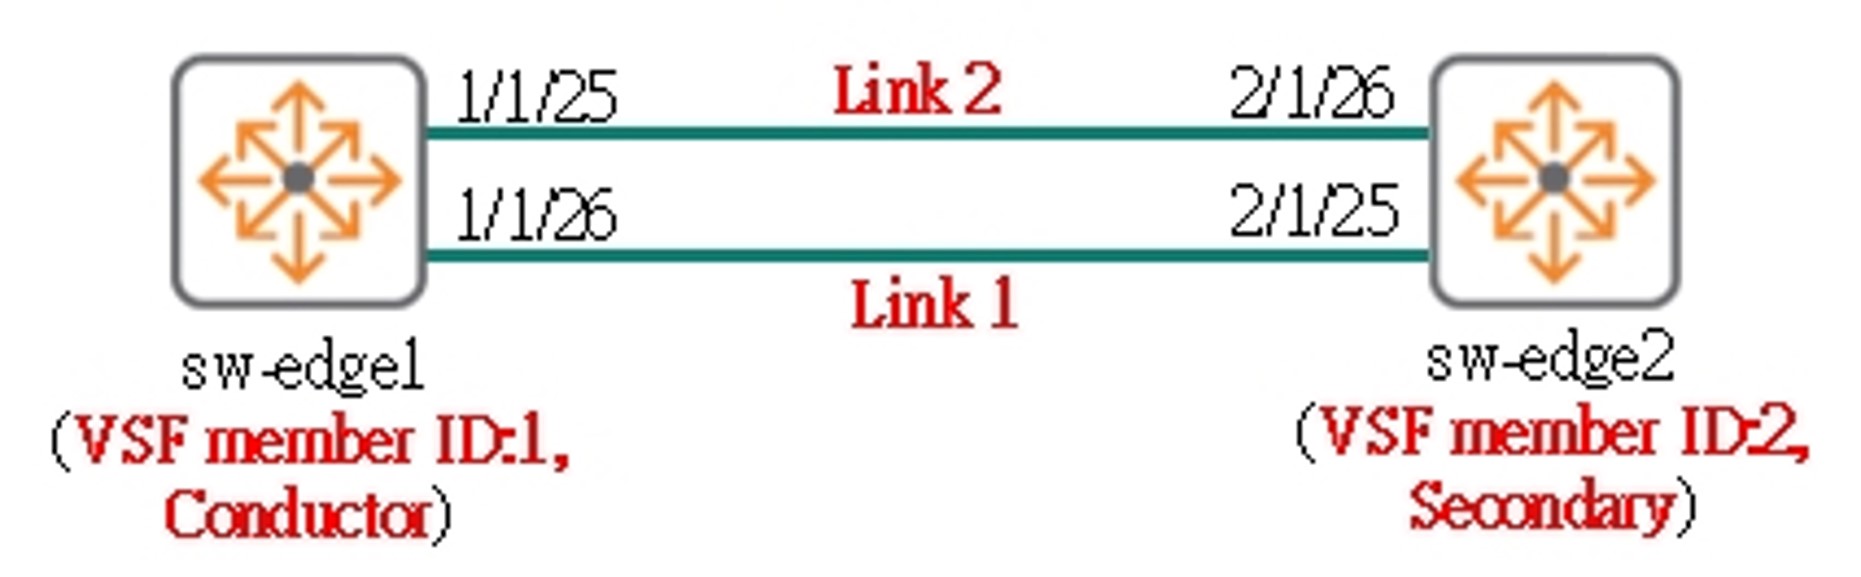
在這次實驗中,我們準備了兩台Aruba CX 6300F交換機(sw-edge1與sw-edge2),使用2條双絞線相互連接成環狀(Ring Topology),為了要使得Auto Stacking功能可以自動作用,就必須要將成員ID為1號的sw-edge1的26號端口連線到成員ID為2號的sw-edge2的25號端口,如下圖。底下是自動堆疊(Auto VSF)實驗拓樸圖與其相關設定步驟:
【步驟1】
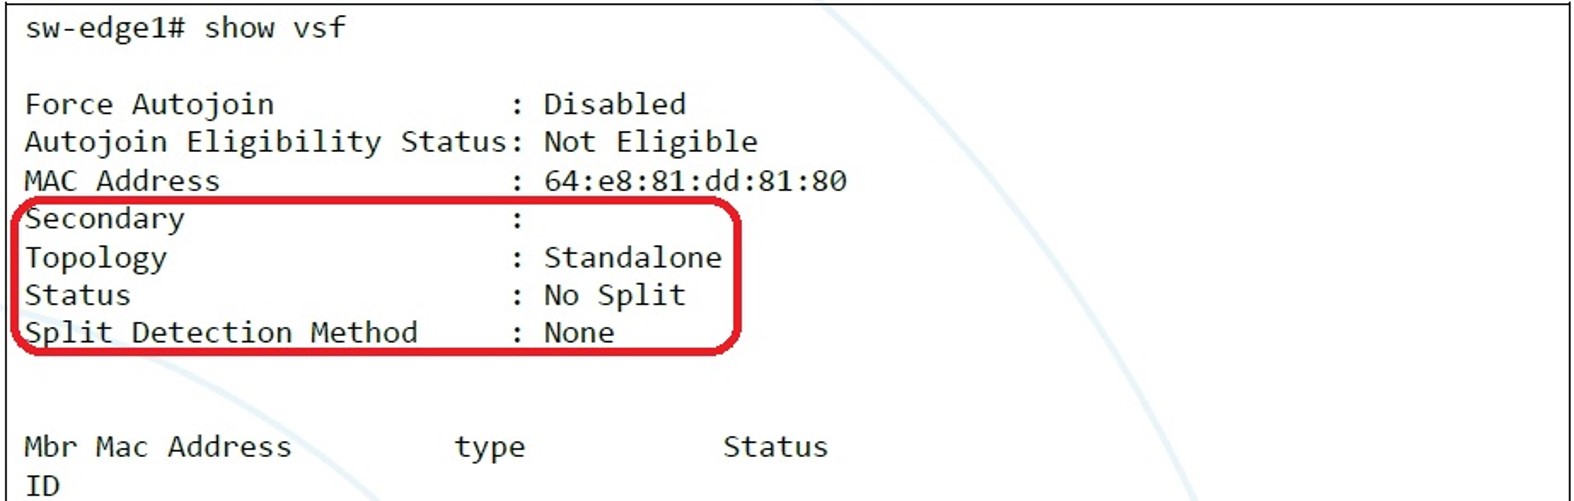
先在sw-edge1交換機的終端機上檢視VSF相關的預設狀態,其中每台Aruba CX交換機的VSF功能預設是啟動的,而且成員ID預設為1號,本身並扮演conductor角色。

【步驟2】
在sw-edge1交換機的終端機上檢視VSF相關的預設組態檔,其中Aruba CX 6300F交換機的產品代碼為JL666A。

【步驟3】
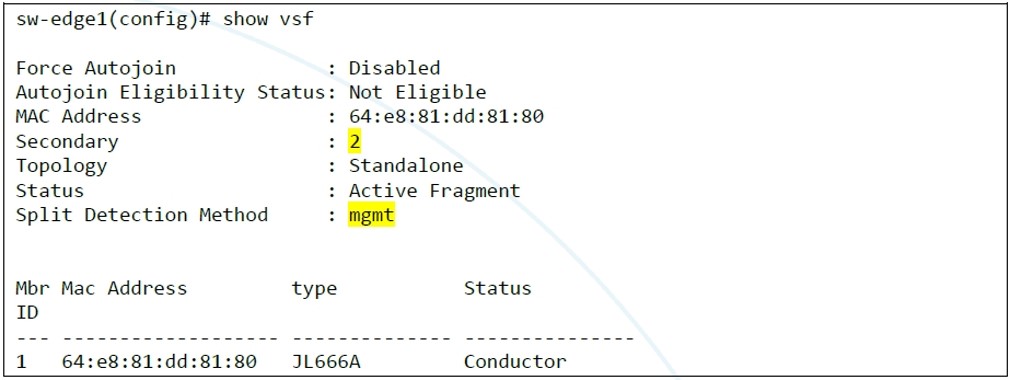
在sw-edge1交換機的終端機上指定未來要扮演secondary角色的成員ID為2號,並設定使用OOBM(out-of-band management)的mgmt端口來偵測堆疊分裂(split stack)的現象。
注意 vsf secondary-member 2指令必須要等到sw-edge2交換機加入到VSF堆疊(步驟6)後,才會生效執行。


【步驟4】
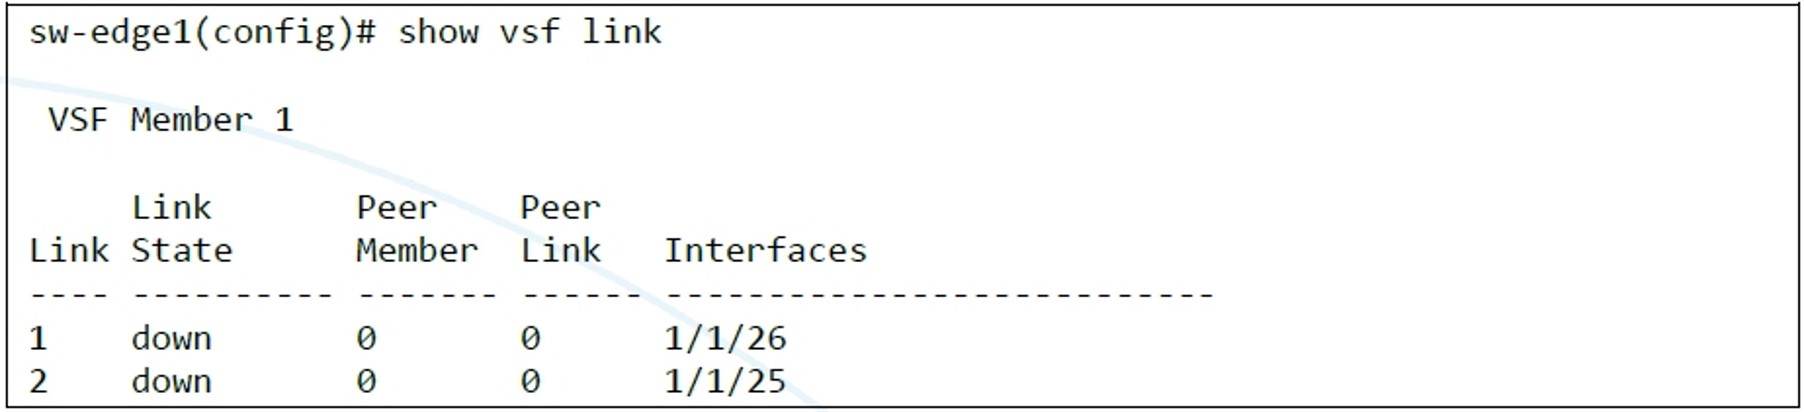
在sw-edge1交換機的終端機上設定第一條VSF連線(link 1)連接在26號端口,與第二條VSF連線(link 2)連接在25號端口。
注意 1 本步驟的連線相當重要,第一條VSF連線必須要將sw-edge1交換機的高號碼端口連接在sw-edge2交換機的低號碼端口(也就是link 1連線必須要將sw-edge1交換機的26號端口連接在sw-edge2交換機的25號端口),才會自動形成VSF堆疊。
注意 2 當端口被指派給VSF link時,該端口原有的設定都會被移除。


【步驟5】
此時因為sw-edge2交換機尚未加入到VSF堆疊,所以在sw-edge1交換機的終端機上檢視VSF的拓樸連接圖時,只會出現成員ID為1號的sw-edge1交換機。


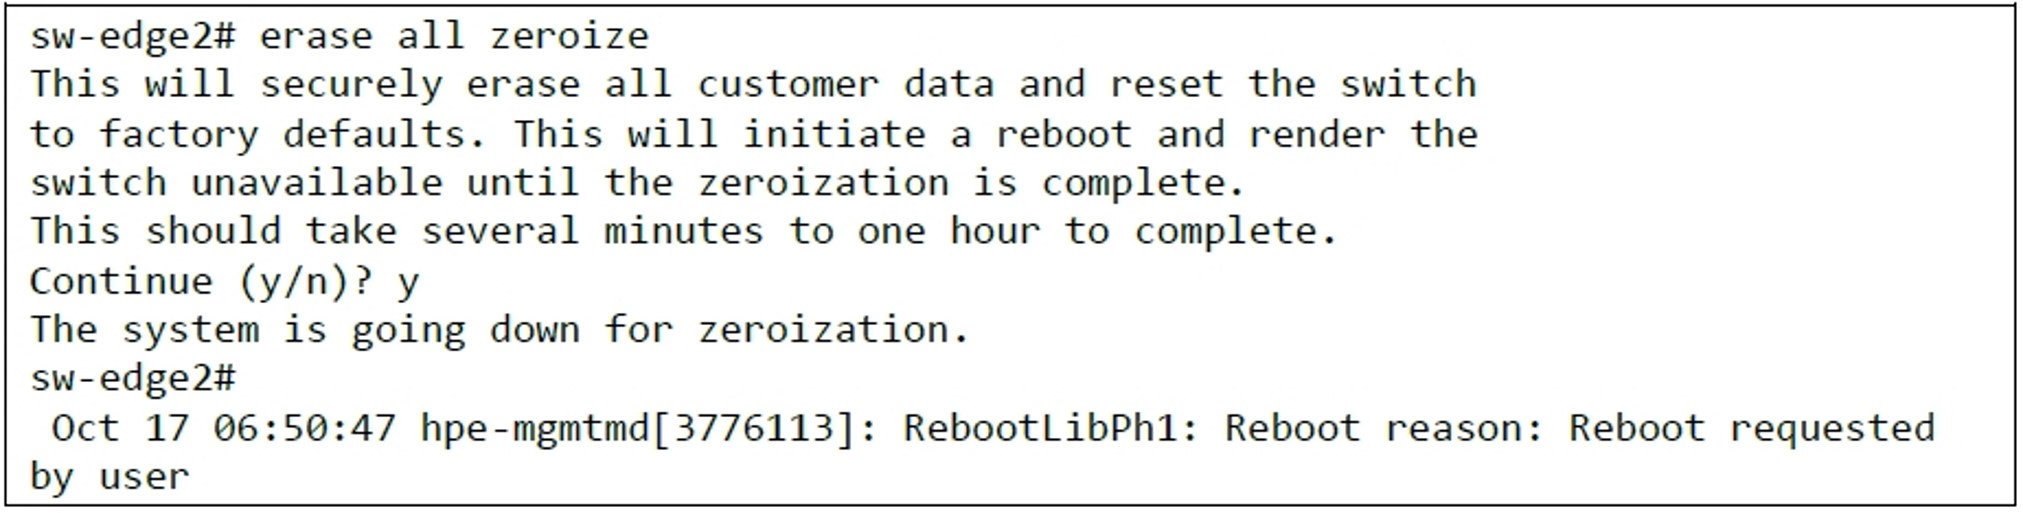
【步驟6】
在sw-edge2交換機的終端機上,將sw-edge2交換機恢復成出廠預設值(factory reset),並在進行重啟開機後,移除所有既有的設定。
【步驟7】
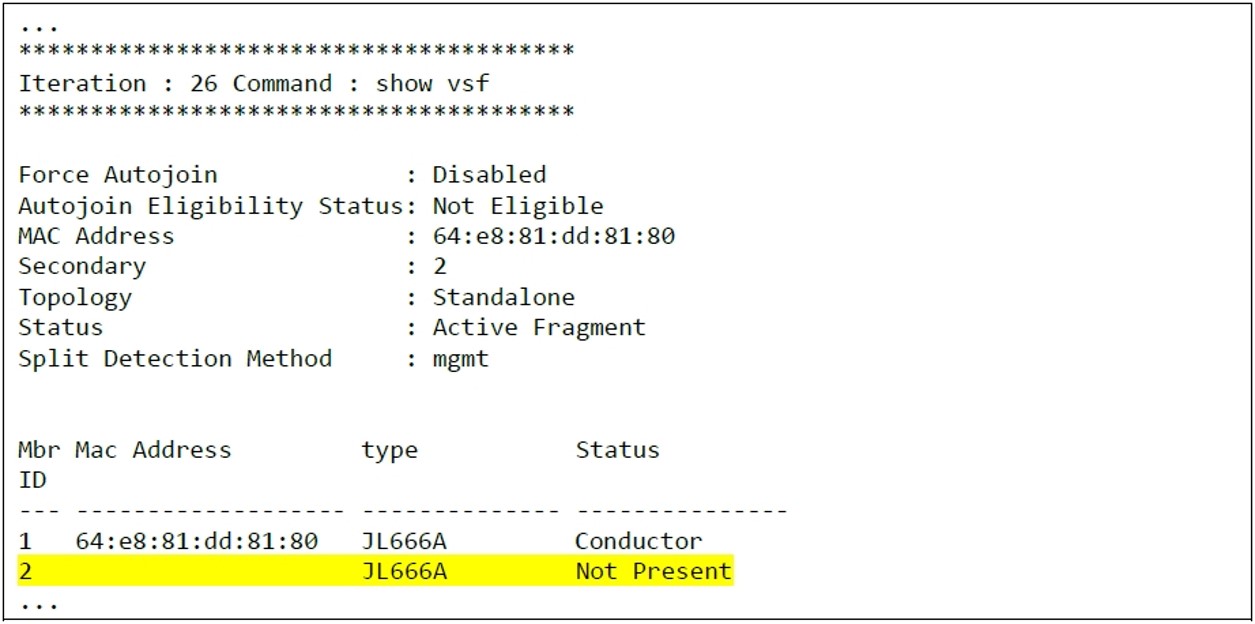
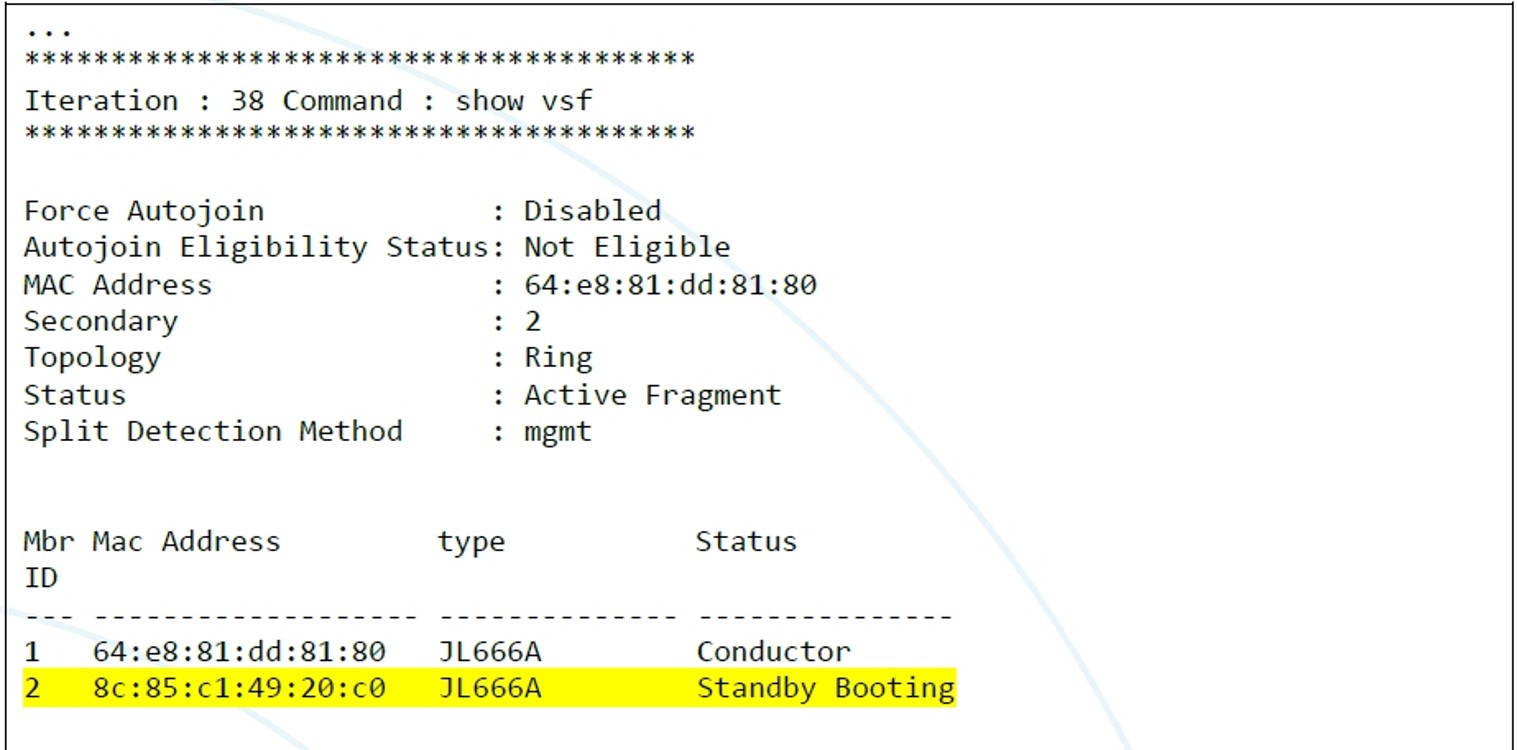
Sw-edge2交換機在重啟開機後,會傾聽來自從sw-edge1交換機所送過的VSF封包,並在數分鐘後自動加入VSF堆疊裡。
注意 請在sw-edge2交換機開機後,在sw-edge1交換機的終端機上重複使用show vsf指令觀察sw-edge2交換機加入到VSF堆疊的過程。


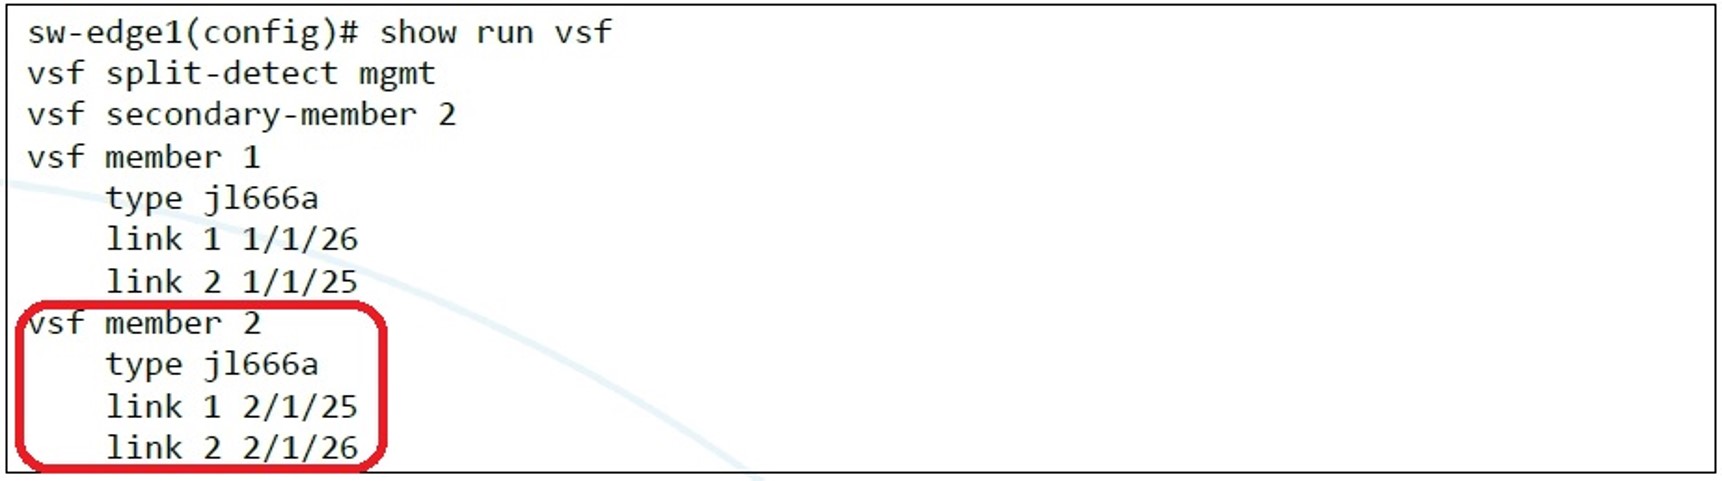
【步驟8】
在sw-edge2交換機自動加入VSF堆疊後,你也可以看到在sw-edge1交換機的組態檔內,出現成員ID為2號(就是sw-edge2交換機)的VSF相關設定。
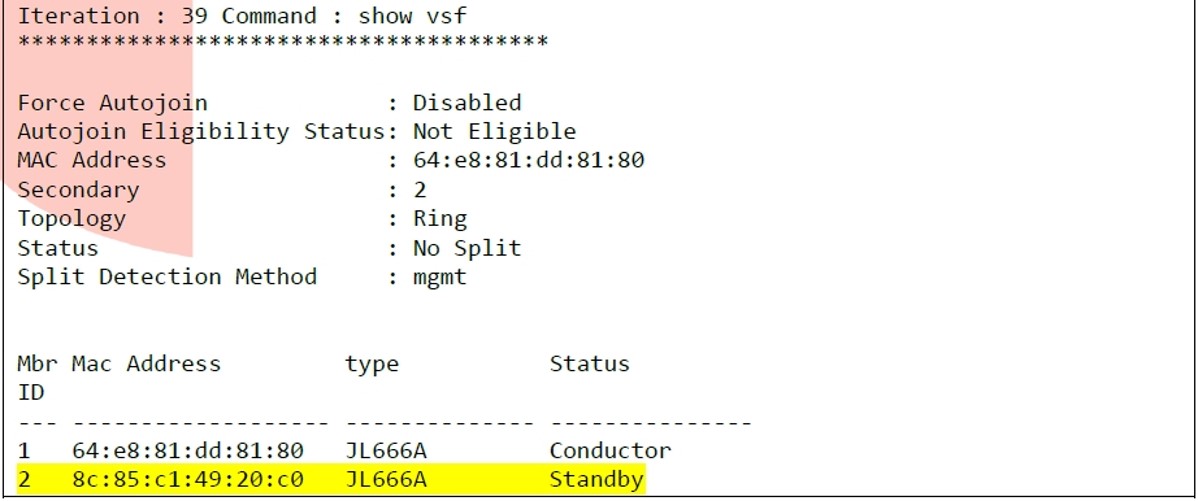
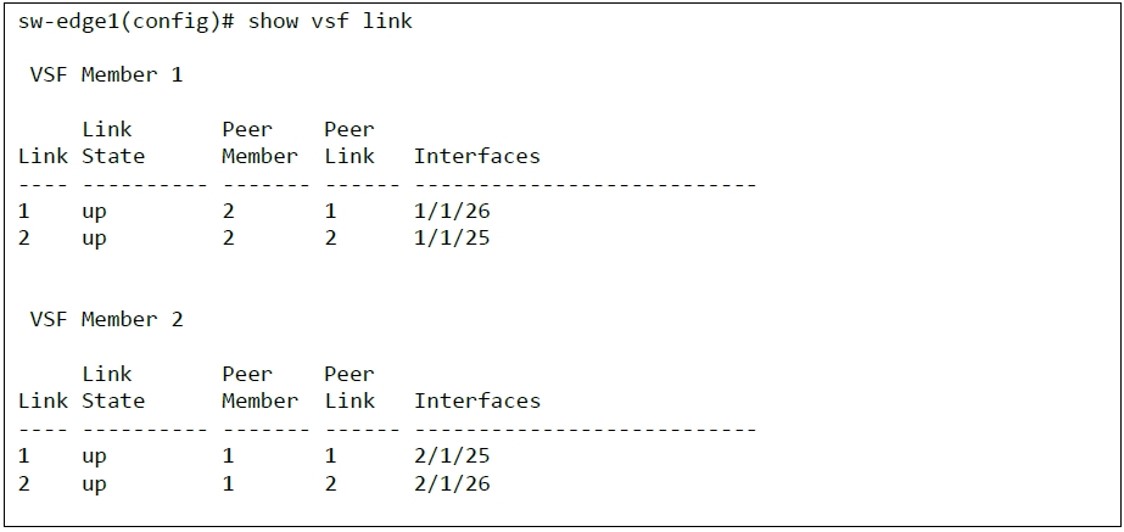
【步驟9】
此時你可以在sw-edge1交換機的終端機上檢視最後完成的VSF堆疊連接拓樸圖,與其各成員所設定的VSF連線。


您可在下列課程中了解更多技巧喔!